How Diy 8mm Film Transfers can Save You Time, Stress, and Money.
In addition to the naturally much better capture, software application on the computer can perform image processing to get rid of problems like scratches, do color balance correction, and set light levels. Up-converting from the movie's natural frame rate to videos 30 fps can be performed in an intelligent way to reduce the distortions that might take place.
With excellent building and construction and cautious operation, frame by frame capture can measure up to the quality acquired by high-end scanning equipment (described next). Nevertheless, nothing is ensured; some frame by frame equipment is not well made, or the operator of the devices might be reckless or incompetent. Here are a few links to individuals who make this kind of equipment, some simply for personal use.
The Greatest Guide To 8mm Film Transfers
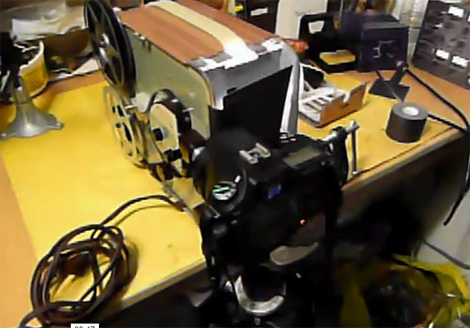
I will note that Fred Van de Putte has actually produced some sensational outcomes with his home made equipment: There are specially developed devices for transferring movie to digital format; these makers were initially used by high end video production companies to transfer theatrical films to digital format for broadcasters to use.
The word you ought to utilize when doing searches on the subject is "telecine." Like the "frame by frame" capture just described, movie scanners likewise catch images a frame at a time, but in a more sophisticated way. Rather than taking a picture of each frame, like a video camera, they scan the film a line at a time and even a pixel at a time.
Not known Facts About Transfer 8mm Film To Digital
Such devices is usually part of a suite of hardware committed to image processing, with trained operators to change lighting and right color. When going over color correction, there are a couple of terms to find out. The best quality, and most expensive, is "scene by scene" correction. The operator will adjust lighting and color correction for each scene, and will ensure consistency in the colors in between various scenes.
"One light", the least expensive method, means the colorist will make a best compromise that appears to work across all scenes; in reality, if there is a dramatic shift in lighting https://en.search.wordpress.com/?src=organic&q=slides to digital or color, the colorist will likely rewind and adjust at that point. Another benefit of film scanners is they advance the film continually, instead of utilizing the normal gear advance and register scheme.
The 9-Second Trick For Diy 8mm Film Transfers
Some old films can even diminish, leading to bad gear hole spacing. The film scanner software application has a means of signing up each frame without relying on sprocket holes to do the task. Having been around for a long period of time, these high end movie scanners are now getting inexpensive enough for use in recording home motion pictures.
In either case, the quality is likely to be a cut above frame by frame capture equipment. To process 8mm movie, these machines need custom adapters, given that they were developed for 16mm and 35mm work. Rank Cintel scanners were the leading end scanners, however the Spirit Data Cine 4K now appears to be the (really costly) top end.
The 5-Minute Rule for Digitalization Of 8mm Film
No matter which record scheme is utilized, ultimately you need to choose in what kind do you desire your digitized video to be returned to you. All such places provide to transfer you films directly to DVD. They can add titles and even climatic music if you prefer it. It is possible to get the video off of these DVDs for subsequent modifying, however it is already heavily compress MPEG 2 video, and isn't convenient for modifying.
Another choice is to have actually the movie moved to a DV video tape; these tapes are digital https://www.washingtonpost.com/newssearch/?query=slides to digital format, and need some methods of transferring the bits from the tape into your PC for more editing. DV files are affordable for editing, as they offer frame level access with moderate compression.

An Unbiased View of Transfer 8mm Film To Digital
I mailed a portable difficult drive to the capture home and they returned my movie as uncompressed AVI files. Uncompressed video leads to huge files, but the benefit is that there are no compression artifacts to stress over, and modifying at an approximate frame level is no problem. As a contrast, a standard definition MPEG 2 video discovered on a DVD is usually encoded at 3.5 to 8.0 Mbit/s; DV is 25 Mbit/s; uncompressed video is around 240 Mbit/s.
What resolution should the film be caught? What video container format should be used? What type of code should be used to put the video in the file? Should the movie be recorded with pulldown? Interlaced or progressive format? Some of these subjects (such as option of codec) need their own websites, but here is an extremely, extremely short summary of some of these factors to consider.
Not known Facts About 8mm Film Transfers
It does cost more, though, and processing the results is a lot slower than recording at standard meaning resolution (720x 480). Keep in mind that 8mm frames are rather small (less than 8mm!) and do not naturally contain more than a particular quantity of information. Getting 1920x 1080 capture of such movie will just offer you very clear photos of the movie grain.
As was mentioned, the native movie rate is 16 fps or 18 fps for 8mm film, 24 fps for 16 mm film, and 30 fps for video. One way to transform the native film frame rate to the video frame rate is to duplicate some frames in the video stream.
7 Easy Facts About 8mm Film Digitalization Described
Ask the transfer house to provide you one frame of video for each frame on the movie. You can do frame rate conversion after you have done all of your movie modifying and enhancement. TV has historically provided video in interlaced format, provided at 29.97 fps (in The United States and Canada).

Deinterlacing software can be used to transform interlaced back to progressive format. If you have an option, stick with progressive scan, as it makes subsequent image processing jobs easier. If you utilize an Apple Mac computer system for modifying, you probably want to use quicktime MOV format as the file container.
All about Transferring 8mm Film To Digital
If you utilize a PC, you'll most likely wish to use an AVI file container. For a codec, you must avoid anything that uses a great deal of compression. Highly compressed files are relatively little, however results in quality Get more info loss and difficulty in editing. You wish to save compression to the very end of your chain of modifying tools.
There are some lossless compressors, like huffyuv and lagarith. Apple Pro Res video is also understood as v 210 by its fourcc code, and there are PC codecs for reading this uncompressed format. No matter which format you choose, you must initially ask for a little (like 10 frame) sample of film DIY 8mm Film Transfers encoded because format from your transfer house so you can validate that you have the ability to open it and recuperate the images.
Unknown Facts About Transferring 8mm Film To Digital
Old films can be dirty, or have a build-up of grime from a lifetime of handling. Old films often have suffered scratches; which side of the movie is scratched makes a difference. More affordable transfers merely pack your old movie and go. The next action up is to have the film "cleaned" by mechanically passing it in between brushes to attempt and knock off any dust or dirt.